The M1 chip was another significant change in Mac hardware, as it brought on Apple Silicon, which performs remarkably while consuming less power. Nevertheless, compatibility issues also accompanied this transition, particularly the case of machine learning systems such as TensorFlow designed explicitly to run on an Intel-based system.
You are not alone in your difficulties when trying to figure out how to install TensorFlow on Mac M1. Most developers have problems with Python versions, ARM architecture, package conflict and GPU acceleration. This tutorial is an easy-to-follow, simple, and current tutorial that will help you install TensorFlow to a working setup on an M1 Mac, trap the most common pitfalls, and ensure that all is functioning as intended.
Table of Contents
Why Installing TensorFlow on Mac M1 Is Different?
TensorFlow was first programmed to work on x86-64. Macs based on Apple M1 have ARM64 architecture (aarch64) that has special builds and dependencies.
Key Differences Between Intel Mac and M1 Mac
| Aspect | Intel Mac | Mac M1 |
| Architecture | x86_64 | ARM64 |
| Native TensorFlow | Yes | Limited |
| GPU support | Limited | Metal (via Apple plugins) |
| Python wheels | Widely available | ARM-specific |
Because of these differences, installing TensorFlow on M1 requires Apple-optimized packages rather than standard pip installations.
Compared TensorFlow Versions on Mac M1
It is worth knowing the TensorFlow versions that are consistent with Apple Silicon before one can install it.
TensorFlow Support Overview
| TensorFlow Package | M1 Compatibility |
| tensorflow (standard) | Partial |
| tensorflow-macos | Full |
| tensorflow-metal | GPU acceleration |
| Nightly builds | Experimental |
Tensorflow-metal + tensorflow-macos is the best option to achieve sustainable development.
Tensorflow on Mac M1 System Requirements
You must make sure that your system fulfills the minimum requirements first.
Minimum Requirements
| Component | Requirement |
| macOS | 12.0 (Monterey) or newer |
| Chip | Apple M1 / M1 Pro / M1 Max |
| Python | 3.8 – 3.11 |
| RAM | 8 GB minimum (16 GB recommended) |
| Disk Space | At least 5 GB free |
Keeping macOS updated reduces compatibility issues.
Step 1: Install Homebrew on Mac M1
Homebrew is essential for managing dependencies on macOS.
Why Homebrew Is Important
- Simplifies Python installation
- Manages ARM-compatible packages
- Reduces environment conflicts
Install Homebrew (If Not Installed)
Run the official command in Terminal:
/bin/bash -c “$(curl -fsSL https://raw.githubusercontent.com/Homebrew/install/HEAD/install.sh)”
Verify Installation
brew –version
Step 2: Install Python on Mac M1
Avoid using the system Python. Instead, install Python via Homebrew.
Install Python Using Homebrew
brew install python
Verify Python Version
python3 –version
Recommended Python Versions for TensorFlow
| Python Version | Compatibility |
| 3.8 | Excellent |
| 3.9 | Excellent |
| 3.10 | Good |
| 3.11 | Supported (latest builds) |
Step 3: Create a Virtual Environment (Highly Recommended)
Using virtual environments prevents dependency conflicts.
Create Virtual Environment
python3 -m venv tensorflow-env
Activate Virtual Environment
source tensorflow-env/bin/activate
Why Virtual Environments Matter
| Benefit | Explanation |
| Dependency isolation | No global conflicts |
| Easy cleanup | Remove env if broken |
| Reproducibility | Stable builds |
Step 4: Upgrade pip and Core Tools
Outdated tools often cause installation failures.
Upgrade pip, setuptools, and wheel
pip install –upgrade pip setuptools wheel
Step 5: Install TensorFlow for Mac M1
This is the most critical step.
Install tensorflow-macos
pip install tensorflow-macos
This package is optimized for Apple Silicon and maintained specifically for macOS ARM.
Step 6: Install TensorFlow Metal Plugin (GPU Support)
Apple GPUs do not use CUDA. Instead, TensorFlow uses Metal for acceleration.
Install tensorflow-metal
pip install tensorflow-metal
What tensorflow-metal Does
| Feature | Benefit |
| GPU acceleration | Faster training |
| Native Metal API | Apple-optimized |
| Low power usage | Better efficiency |
Without this plugin, TensorFlow runs only on CPU.
Step 7: Verify TensorFlow Installation
Always verify installation before starting projects.
Check TensorFlow Version
import tensorflow as tf
print(tf.__version__)
Check Available Devices
print(tf.config.list_physical_devices())
Expected Output
| Device | Status |
| CPU | Available |
| GPU | Available (via Metal) |
If GPU appears, your setup is correct.
Step 8: Test TensorFlow with a Simple Model
Run a basic test to ensure everything works.
Simple TensorFlow Test
import tensorflow as tf
import numpy as np
x = np.array([1, 2, 3, 4])
y = np.array([2, 4, 6, 8])
model = tf.keras.Sequential([
tf.keras.layers.Dense(units=1, input_shape=[1])
])
model.compile(optimizer=’adam’, loss=’mse’)
model.fit(x, y, epochs=100)
Successful training confirms a working installation.
Common Errors While Installing TensorFlow on Mac M1
- “No matching distribution found for tensorflow”
Cause: Installing standard TensorFlow instead of Apple build
Fix: Use tensorflow-macos
- TensorFlow Installed but GPU Not Detected
Cause: Missing Metal plugin
Fix: Install tensorflow-metal
- Python Version Incompatibility
| Python Version | Issue |
| 3.7 | Not supported |
| 3.12+ | Experimental |
Always stick to supported versions.
Installing TensorFlow Using Conda (Alternative Method)
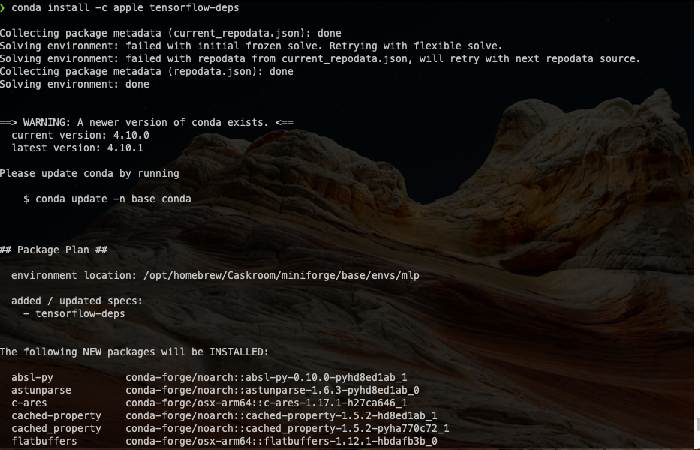
Some users prefer Conda for environment management.
Conda vs pip Comparison
| Feature | Conda | pip |
| Dependency handling | Strong | Moderate |
| Speed | Slower | Faster |
| Popularity on macOS | Medium | High |
Conda Installation Summary
- Install Miniforge (ARM build)
- Create environment
- Install tensorflow-macos
This approach is useful for complex ML stacks.
Performance Expectations on Mac M1
TensorFlow performance on M1 is surprisingly strong.
Benchmark Overview
| Task | CPU | GPU (Metal) |
| Model training | Fast | Faster |
| Inference | Good | Excellent |
| Power usage | Low | Very low |
For small to medium models, M1 performs competitively with entry-level GPUs.
Limitations of TensorFlow on Mac M1
Despite improvements, there are limitations.
Known Limitations
- No CUDA support
- Some third-party TensorFlow addons incompatible
- Limited multi-GPU support
- Certain ops fall back to CPU
Understanding these avoids unrealistic expectations.
Best Practices for TensorFlow on Apple Silicon
Recommended Practices
- Use virtual environments
- Keep Python and macOS updated
- Avoid mixing Intel and ARM packages
- Test GPU availability early
- Use batch sizes optimized for unified memory
TensorFlow vs PyTorch on Mac M1 (Quick Comparison)
| Feature | TensorFlow | PyTorch |
| Apple Silicon support | Strong | Improving |
| GPU via Metal | Yes | Limited |
| Community examples | Extensive | Growing |
| Production deployment | Excellent | Excellent |
TensorFlow currently offers smoother native support on M1.
Frequently Asked Questions
Can I install standard TensorFlow on Mac M1?
You can, but it is not recommended. tensorflow-macos provides better stability.
Does TensorFlow on M1 support GPU?
Yes, via the Metal plugin.
Is TensorFlow slower on M1 than NVIDIA GPUs?
For large models, yes. For development and learning, performance is excellent.
Do I need Rosetta 2?
No. Native ARM builds eliminate the need for Rosetta.
Troubleshooting Checklist
| Issue | Solution |
| Installation fails | Upgrade pip |
| GPU not visible | Install tensorflow-metal |
| Import error | Check virtual environment |
| Slow performance | Verify Metal usage |
Final Thoughts
It can take hours before one understands the correct way to install TensorFlow on Mac M1. A little bit different approach is needed in Apple Silicon which once configured correctly, TensorFlow runs on M1 Macs efficiently and reliably. In python, you can build and train machine learning models without compatibility headaches by using tensorflow-macos, which supports Metal acceleration, and using the best practices, such as virtual environments.
This guide compiles the most effective installation procedures, actual fixes and optimization suggestions depending on the ranking of resources and experiences of the developers. It is an all-inclusive set up that offers a consistent base to develop with TensorFlow on Mac M1 whether you are a beginner in exploring machine learning or a professional in developing models locally.